Based on the LMS platform you are using, choose from the following options to receive step-by-step instructions on how to integrate with Expert TA.
These instructions are designed to help instructors and administrators configure single sign-on and grade sync between the Canvas Learning Management System and Expert TA.
-
In Expert TA, on an existing class, enable LMS integration by selecting “Edit Class” from the Class Menu, and clicking “Configure my Class for LMS Integration.”

-
Select “Canvas” from the dropdown menu, then select “LTI 1.1” from the new dropdown menu that appears to the right. Click “Proceed With Integration.”


-
You will now see the LMS Integration Information displayed under the class details.

-
In Canvas, navigate to the course with which you would like to pair. Then select “Settings,” “Apps”, “View App Configurations”, then choose the “+ App” option.


-
Name your App “Expert TA” and copy-and-paste the Consumer Key, Shared Secret, and Launch URL associated with your Expert TA class into the appropriate fields. The Domain should be “lti.theexpertta.com” and the Privacy will need to be set to “Public.” Submit your changes.

-
Now that the LMS connection has been configured, you are ready to create assignments. Expert TA assignments will need to be linked individually to Canvas.
-
Create your assignment in Expert TA by choosing “Create Class Assignment” from the Class Menu. Give the assignment a name and description, adjust the dates accordingly, and add problems. Click “Save” and you will see an LMS Assignment link generated at the top of the page.
IMPORTANT: DO NOT SKIP THE NEXT STEP! Attempting to add in the LMS assignment link as a hyperlink will cause issues.

-
Create a corresponding assignment in Canvas. Under “Submission Type” select “External Tool.” Paste the LMS Assignment link from Expert TA, and we highly recommend that you select the “Load This Tool In A New Tab” option for the best possible student user experience.
IMPORTANT: Do not select “Find” for this step. It will alter the link you have entered which will cause an error when attempting to enter the assignment.
IMPORTANT: DO NOT use the “Due” date field at the bottom of the page. Instead, use the “Available from” and “Until” fields. If a student accesses an assignment in Expert TA after the Due date in Canvas, their grades will be updated and reflect late work.

-
Repeat the previous two steps for linking Expert TA with each subsequent assignment you create for your class.
These instructions are designed to help instructors and administrators configure single sign-on and grade sync between the Canvas Learning Management System and Expert TA.
-
IMPORTANT: Your school will need to be connected to Expert TA at an institutional level. If you are unsure if your school has this level of connection, you can reach out to your Expert TA account manager or the IT department at your school.
-
If your institution is connected to Expert TA with LTI 1.3, you are ready to create assignments. Expert TA assignments will need to be linked individually to Canvas.
-
In Expert TA, on an existing class, enable LMS integration by selecting “Edit Class” from the Class Menu, and clicking “Configure my Class for LMS Integration.”
-
Select “Canvas” from the dropdown menu, then select “LTI 1.3” from the new dropdown menu that appears to the right. Click “Proceed With Integration.”

-
Create your assignment in Expert TA by choosing “Create Class Assignment” from the Class Menu. Give the assignment a name and description, adjust the dates accordingly, and add problems. Click “Save” and you will see an LMS Assignment link generated at the top of the page.
IMPORTANT: DO NOT SKIP THE NEXT STEP! Attempting to add in the LMS assignment link as a hyperlink will cause issues.
-
Create a corresponding assignment in Canvas. Under “Submission Type” select “External Tool.” Paste the LMS Assignment link from Expert TA, select “Load This Tool In A New Tab” option.
IMPORTANT: Do not select “Find” for this step. It will alter the link you have entered which will cause an error when attempting to enter the assignment.
IMPORTANT: DO NOT use the “Due” date field at the bottom of the page. Instead, use the “Available from” and “Until” fields. If a student accesses an assignment in Expert TA after the Due date in Canvas, their grades will be updated and reflect late work.
-
Repeat the previous two steps for linking Expert TA with each subsequent assignment you create for your class.
IMPORTANT: Your IT department should fully configure BlackBoard to support Expert TA as an approved LTI provider before creating or attempting to link any individual classes to Expert TA. If any classes are created before the LTI provider support is fully set up, class assignments will not have the required fields to assign linked assignments.
-
Once logged into Blackboard, navigate to the System Admin tab in order to set up the LTI Tool Provider settings.

-
Under “Manage Global Properties”, enable the settings to match the following options boxed in red and submit.

-
Under “Register Provider Domain”, enable the settings to match the following options boxed in red and submit. In some institutions, the IT department may want to be more restrictive regarding approval, however, Expert TA must be an approved provider fully configured in order to link assignments. Allowing only links to approved tool providers could be the correct answer for an Institution that wishes to lock this feature down. All other settings should be considered required to configure the process fully.

-
In Expert TA, on an existing class, enable LMS integration by selecting “Edit Class” from the Class Menu, and clicking “Configure my Class for LMS Integration.”
-
Select “Blackboard” from the dropdown menu, then Click “Proceed With Integration.”


-
You will now see the LMS Integration Information displayed under the class details.
IMPORTANT: Save this information! You will be using it to connect each assignment in Blackboard to Expert TA.
-
Now that the LMS connection has been configured, you are ready to create assignments. Expert TA assignments will need to be linked individually to Blackboard.
-
Create your assignment in Expert TA by choosing “Create Class Assignment” from the Class Menu. Give the assignment a name and description, adjust the dates accordingly, and add problems. Click “Save” and you will see an LMS Assignment link generated at the top of the page.
-
In Blackboard, navigate to the course with which you would like to pair. Then select “Content”, “Build Content”, “Web Link”.
IMPORTANT: Do not put assignments in learning modules.

-
The following settings will need to be configured for each assignment you create in Blackboard.
-
Name the assignment to match your Expert TA assignment (for consistency)
-
Paste the Assignment Link Code you copied earlier from your Expert TA Assignment Edit Screen.
-
Ensure the “This link is to a Tool Provider” option is checked.
-
Paste the Consumer Key from the Expert TA Configuration Settings
-
Paste the Shared Secret from the Expert TA Configuration Settings
-
Enable Evaluation (Grade pass-through) set to “Yes”.
-
Input your points possible for the assignment (must be greater than 0 for grades to be posted)

-
-
Repeat the previous two steps for linking Expert TA with each subsequent assignment you create for your class.
These instructions are designed to help instructors and administrators configure single sign-on and grade sync between the Brightspace/D2L Learning Management System and Expert TA.
-
In Expert TA, on an existing class, enable LMS integration by selecting “Edit Class” from the Class Menu, and clicking “Configure my Class for LMS Integration.”
-
Select “Desire 2 Learn” from the dropdown menu, then Click “Proceed With Integration.”


-
You will now see the LMS Integration Information displayed under the class details.
IMPORTANT: Save this information! You will be using it to connect each assignment in Brightspace/D2L to Expert TA.
-
Log into your instructor account within Brightspace and select “External Learning Tools (LTI)” from the top menu. Then, select “Manage Tool Providers” from the now available sub-menu, then select “New Tool Provider”.

-
Using the Expert TA LMS Configuration Settings you gathered earlier, fill out the appropriate fields in the “New Tool Provider” form.
The following items should be set accordingly:
- Version: Inherit Global (1.1)
- OAuth Signature Method: HMAC-SHA1
- Secret: Shared Secret From Expert TA Class
- Tool Consumer Information: Checked
- Key: Shared Key From Expert TA Class
- Visibility: Checked
- Security Settings: According to the picture below
Select “Save and Close”

-
Now that the LMS connection has been configured, you are ready to create assignments. Expert TA assignments will need to be linked individually to Brightspace/D2L.
-
Create your assignment in Expert TA by choosing “Create Class Assignment” from the Class Menu. Give the assignment a name and description, adjust the dates accordingly, and add problems. Click “Save” and you will see an LMS Assignment link generated at the top of the page.
-
From the main Content screen of the New Brightspace User Experience, select the Unit, Lesson, Folder, etc… you would like to add the Expert TA link. Then, select “Create New” from the right side of the screen.

-
Select “External Tool Activity” from the following screen.

-
You will then name the activity, provide the assignment link, and select “Create and Insert”

-
IMPORTANT: The Expert TA assignment will not load correctly if launched within the Brightspace/D2L platform. You must force the assignment to open in a new tab by following the next steps.
-
Select the three dots from the far right side of the screen, then select Edit.

-
Select the option “Open in a new tab” and then select “Save”

These instructions are designed to help instructors and administrators configure single sign-on and grade sync between the Moodle Learning Management System and Expert TA.
-
In Expert TA, on an existing class, enable LMS integration by selecting “Edit Class” from the Class Menu, and clicking “Configure my Class for LMS Integration.”
-
Select “Moodle” from the dropdown menu, then click “Proceed With Integration.”


-
You will now see the LMS Integration Information displayed under the class details.
IMPORTANT: Save this information! You will be using it to connect each assignment in Brightspace/D2L to Expert TA.
-
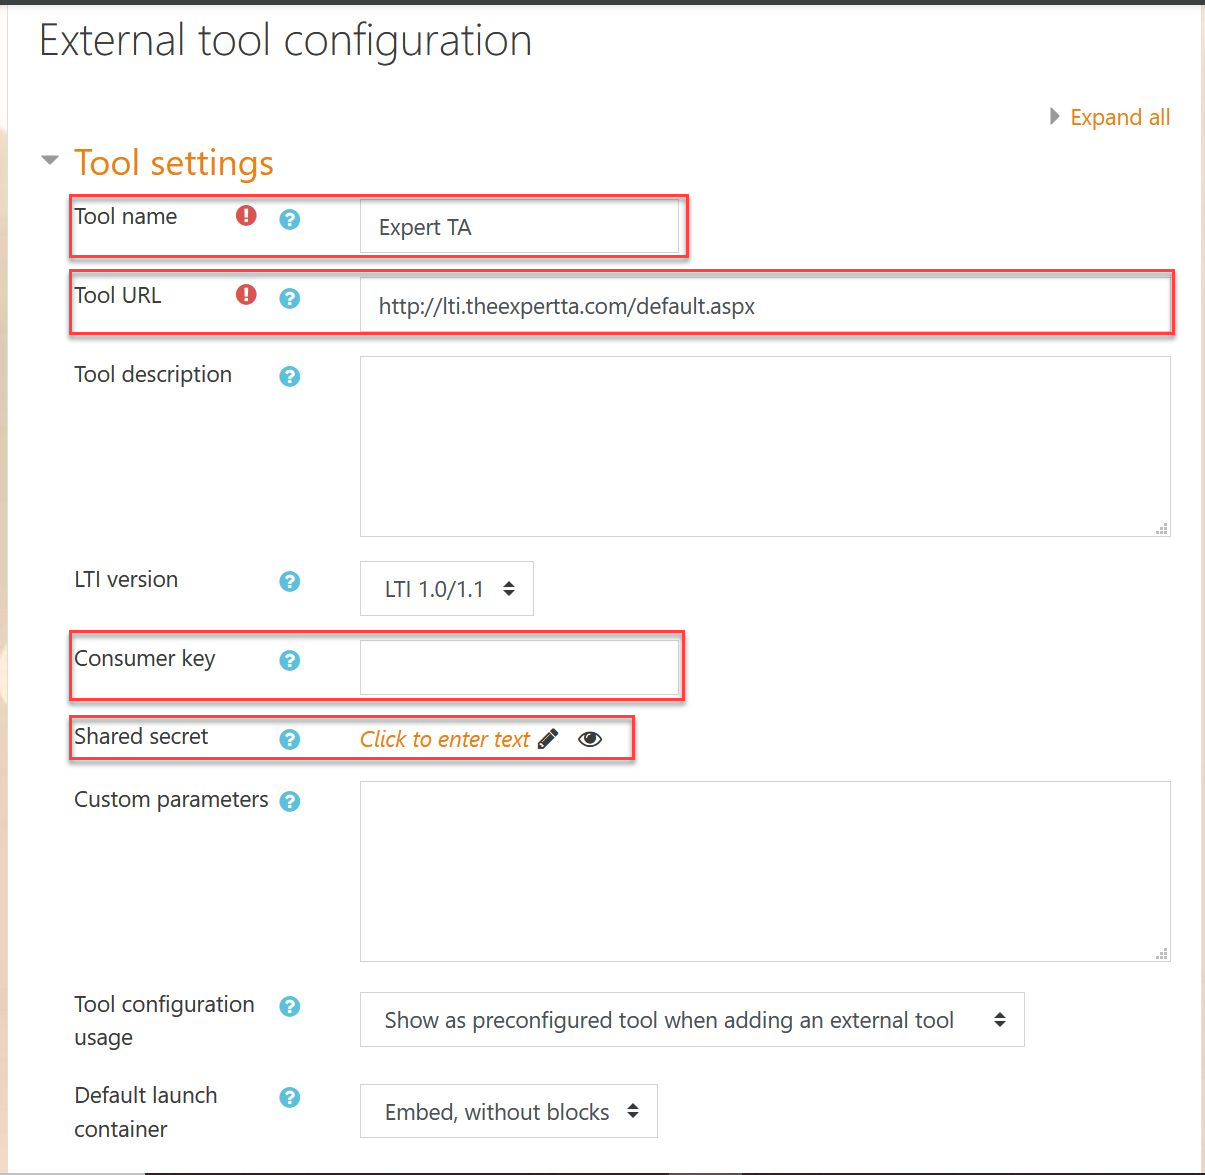
Within a Moodle Admin account, navigate to the “Manage tools” screen and select “configure a tool manually”. You will be presented with a screen like the following image.
-
Using the Expert TA LMS Configuration Settings recorded earlier, fill out the following fields accordingly:
- Tool Name: Add Tool name (e.g., Expert TA)
- Tool URL (i.e., Launch URL)
- Consumer Key
- Shared Secret
-
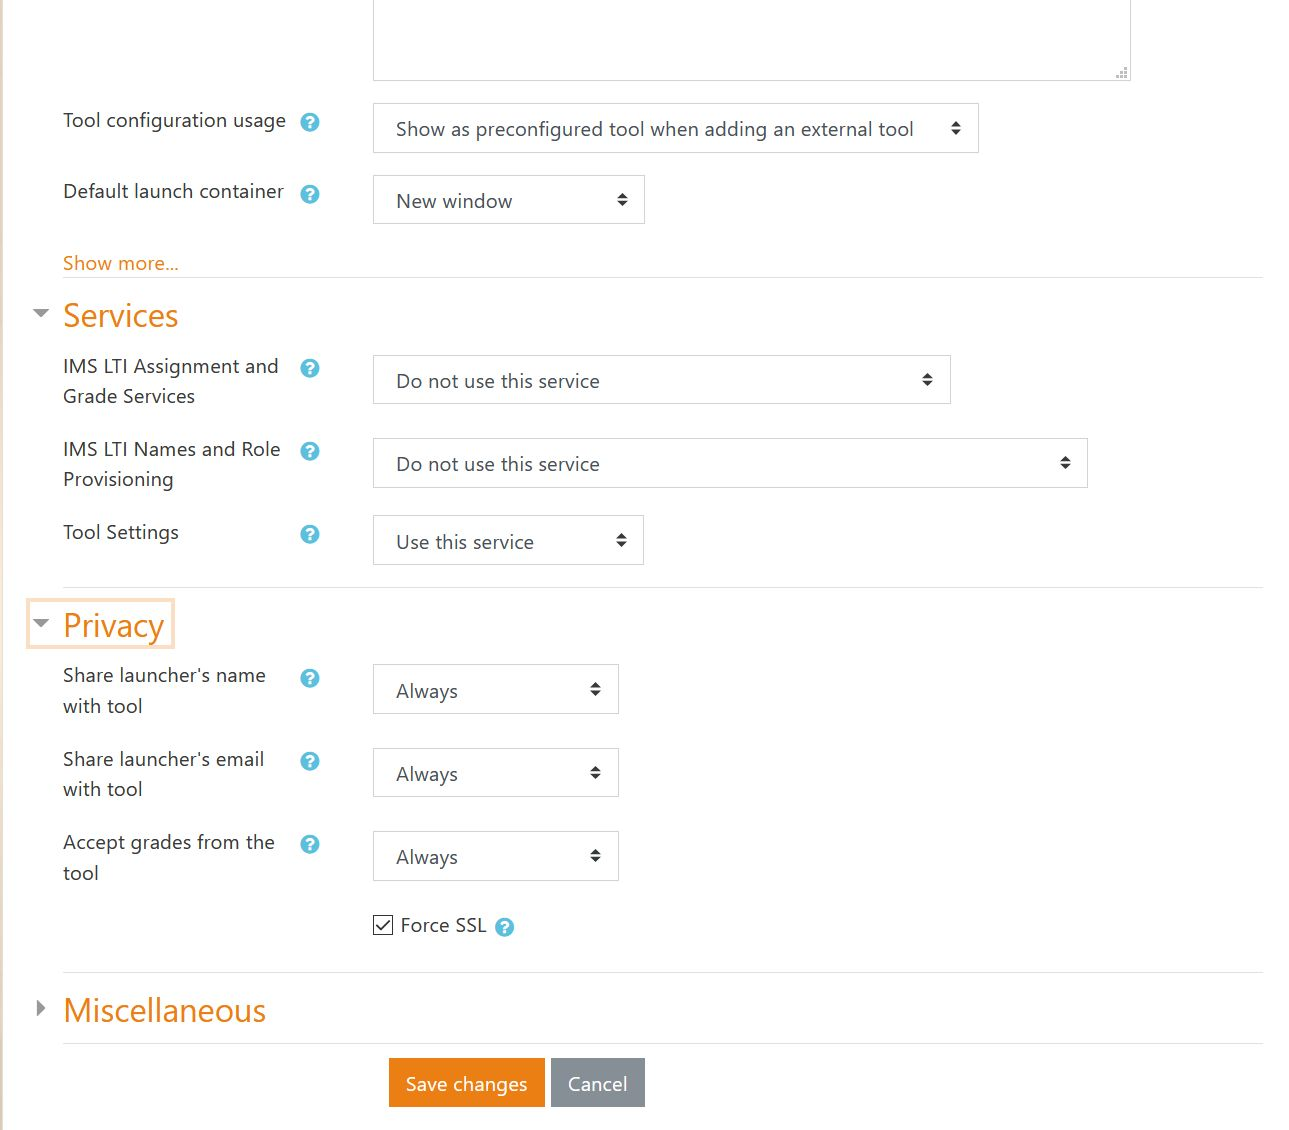
Set the remainder of settings to those found in the image below to ensure all information is transferred between Moodle and Expert TA properly. Once all settings are configured, select “Save changes”.
-
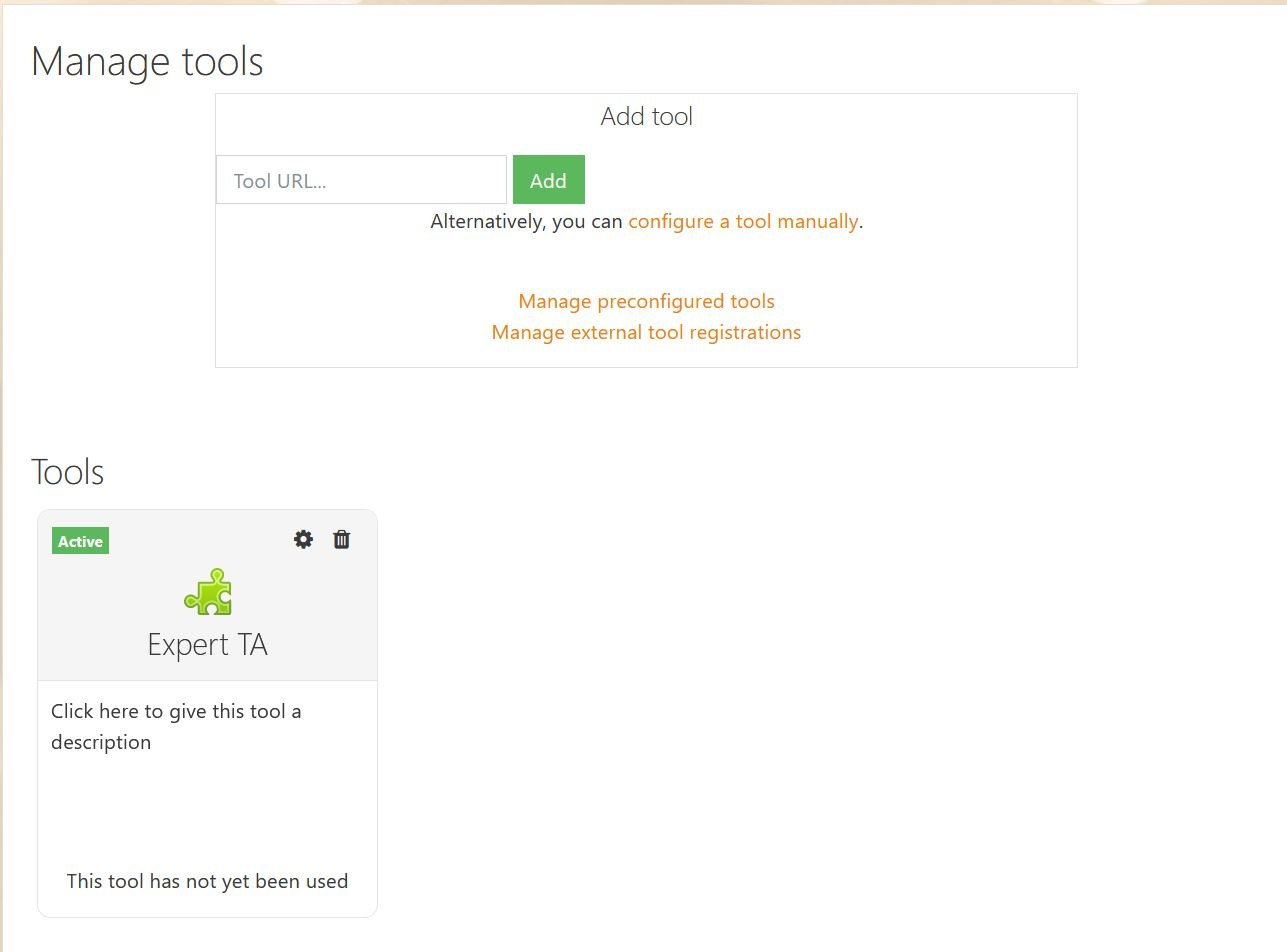
You will now see the tool in your “Manage tools” screen, like the image shown below.
-
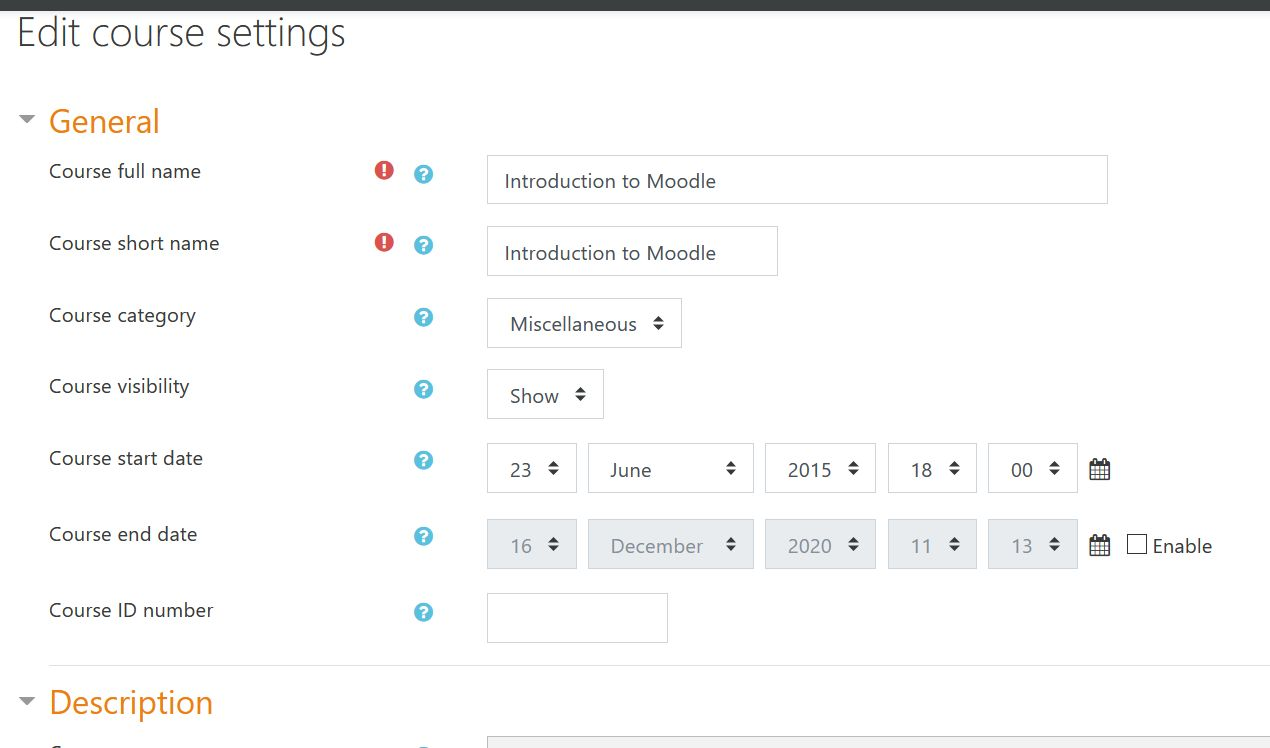
Ensure your “Course visibility” has been set to “Show”.
-
Now that the LMS connection has been configured, you are ready to create assignments. Expert TA assignments will need to be linked individually to Moodle.
-
Create your assignment in Expert TA by choosing “Create Class Assignment” from the Class Menu. Give the assignment a name and description, adjust the dates accordingly, and add problems. Click “Save” and you will see an LMS Assignment link generated at the top of the page.
-
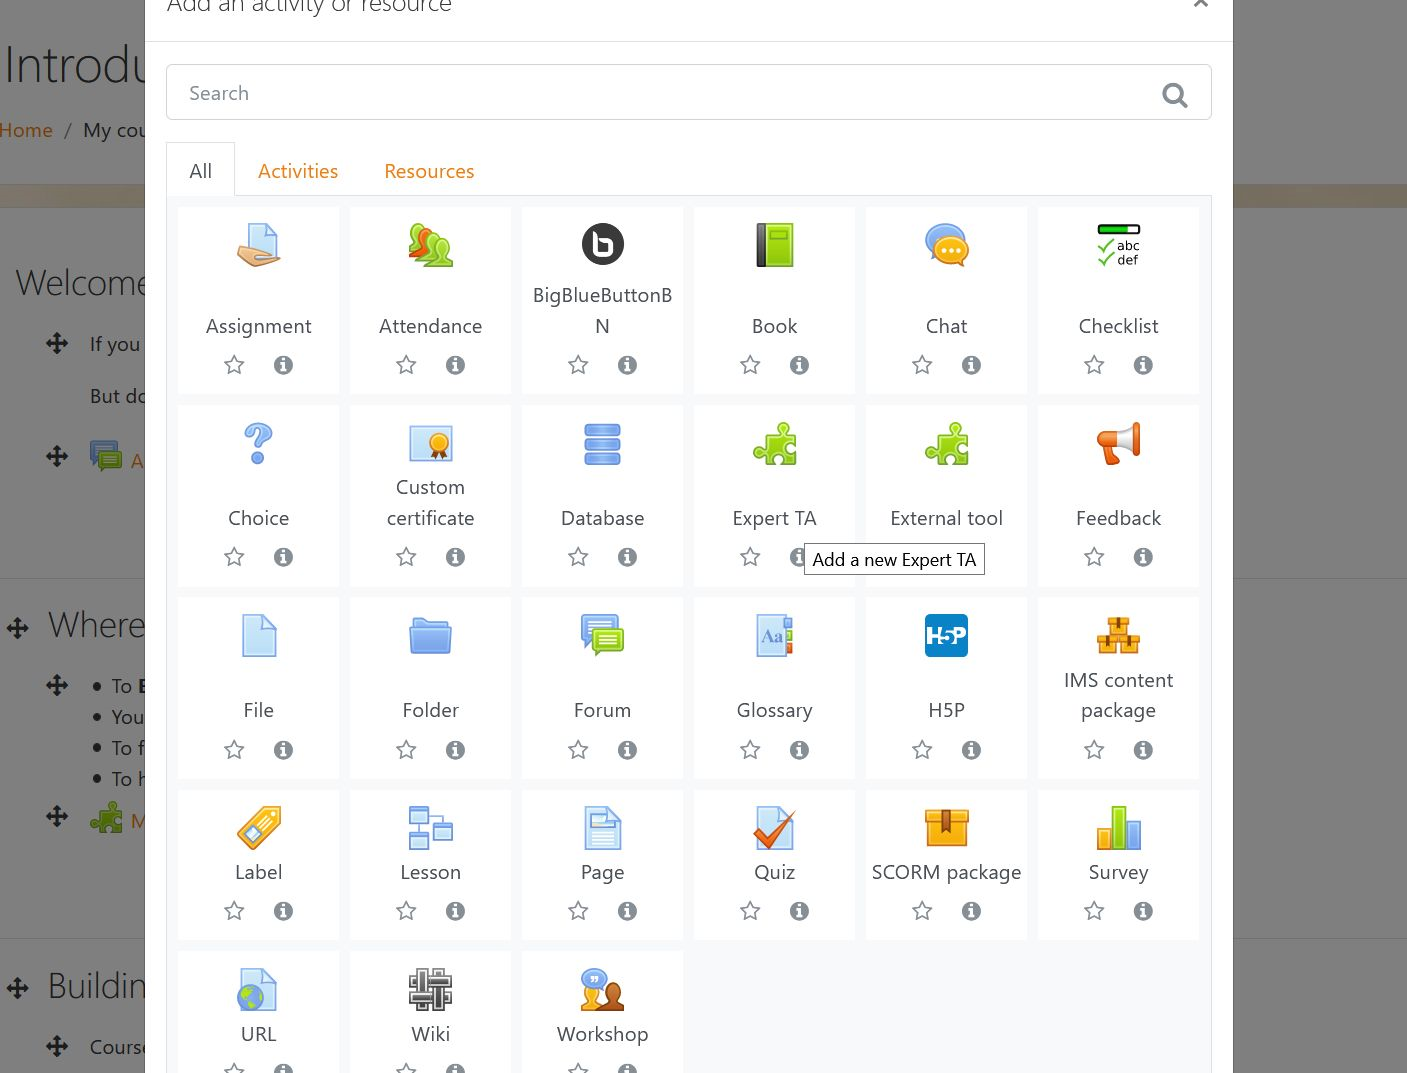
From within the Course, choose “Add an activity or resource” and select Expert TA from the list provided.IMPORTANT: The course must be set to “EDIT” for this step to be possible
-
From the create activity page, using the Expert TA LMS Configuration Settings we recorded earlier, fill out the following fields accordingly:
- Name the assignment to match the Expert TA Assignment (for consistency)
- Add the Tool URL
- Add the Consumer Key
- Add the Shared Secret
- Set “Launch Container” to “New Window” IMPORTANT
IMPORTANT: If “Launch Container” is not set to “New Window”, errors will occur when accessing the Expert TA assignment.

-
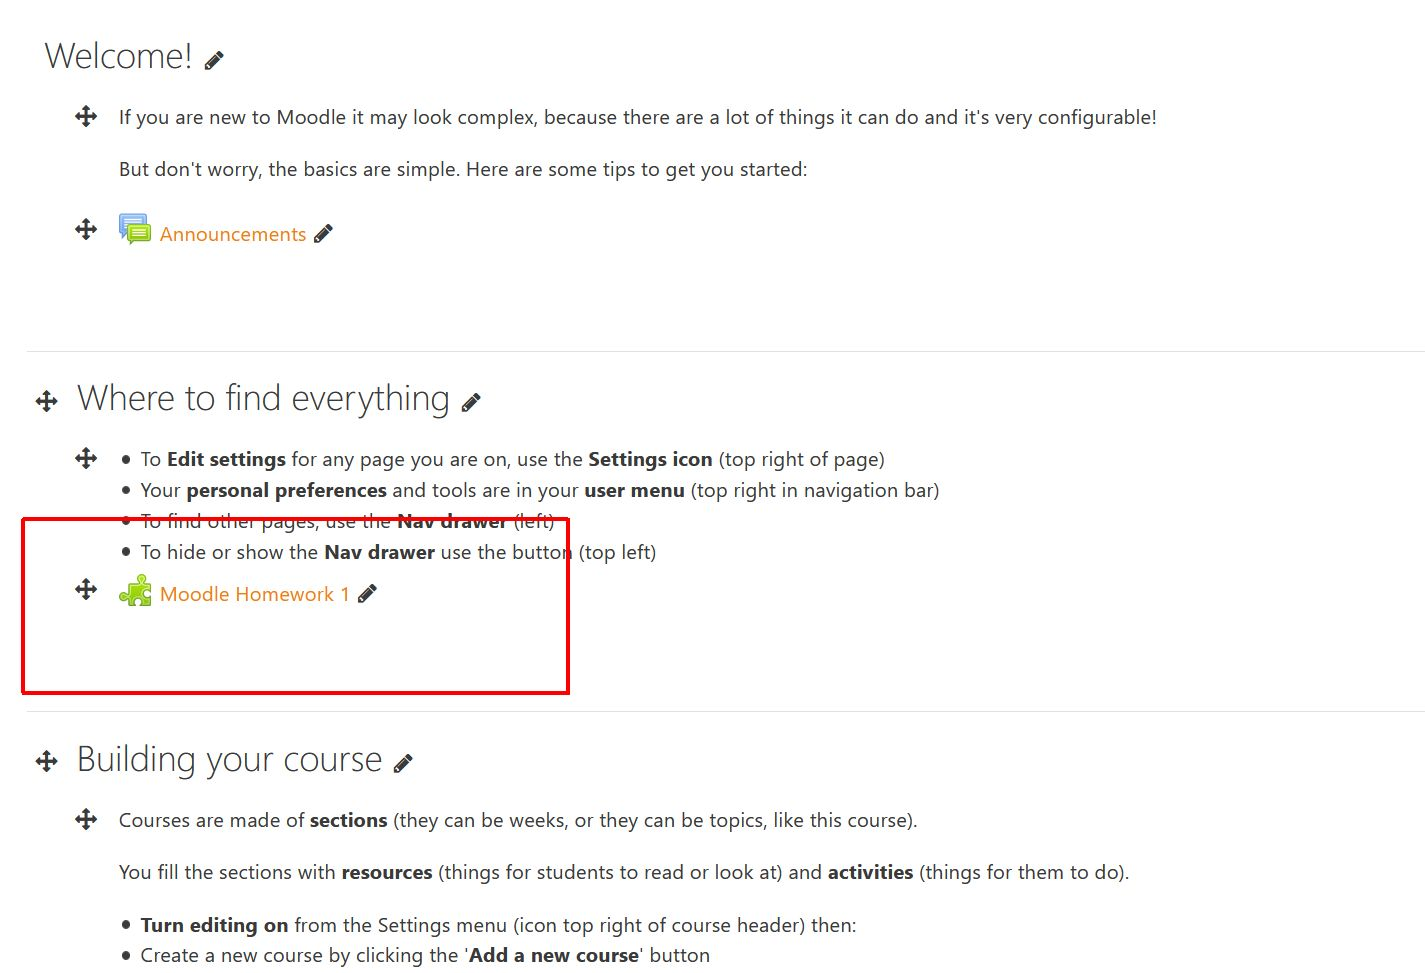
Save the activity, and you will now see the new assignment in your course.
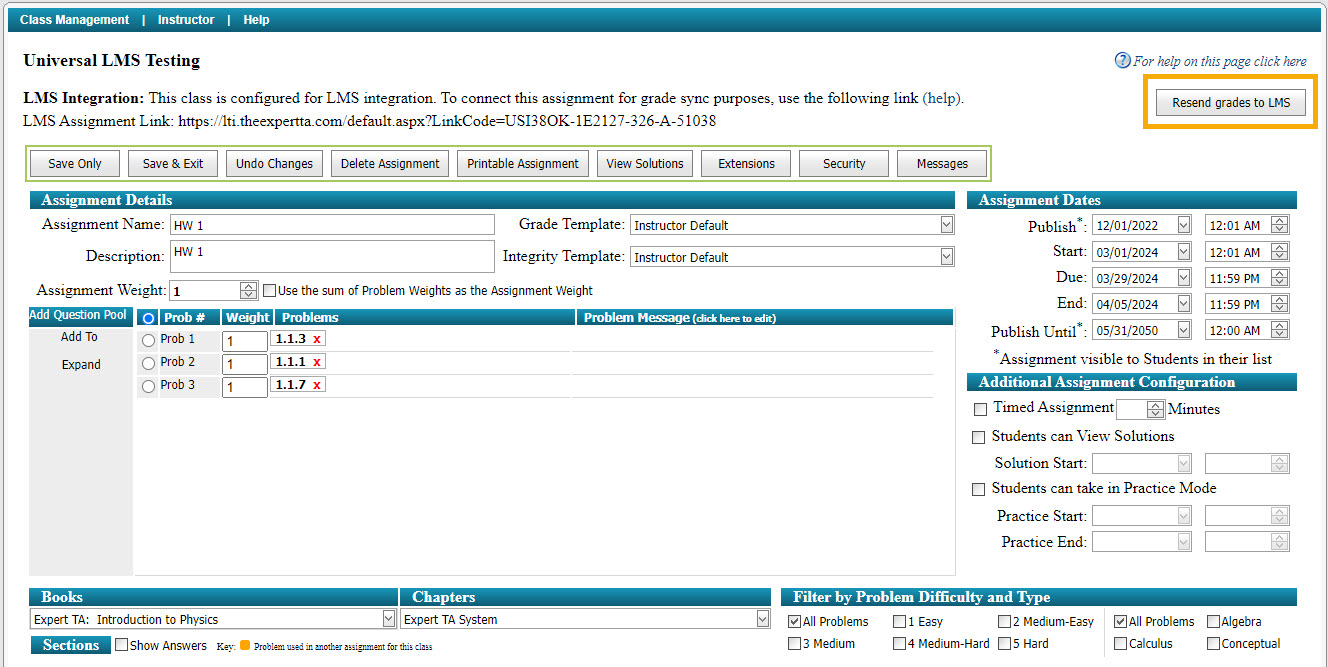
In the event of a grade change within an Expert TA assignment, grades can be resent back to any LMS platform by clicking the “Resend Grades” button within the Expert TA assignment the grades are associated with.